I recently received an email asking me to do a breakdown on how to disassemble the Nordictrack t7 SI treadmill for moving. I’ve done a few of these now and since they seem to get a good response I was happy to oblige. So to better help anyone with this model of treadmill. Below is a quick guide to disassembling a Nordictrack t7 SI. With all images taken directly from the owner’s manual (linked below).
* All images are taken directly from the Nordictrack t7 SI owners manual.
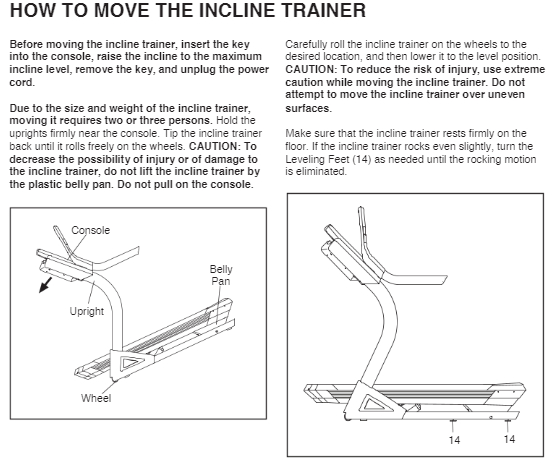
How to Roll / Move the Nordictrack t7 SI treadmill
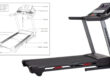
Below is an image showing the proper way of moving/rolling the Nordictrack t7 SI.
A Step by Step Guide on How to Disassemble the Nordictrack t7 SI Treadmill
Tools Needed for Disassembly

- 1 Hex Head Scree Driver
- Phillips Head Screwdriver
- Adjustable Wrench
* To avoid damaging parts, do not use power tools.
Disassembly Instructions
Step 1 – Removing Storage Latch
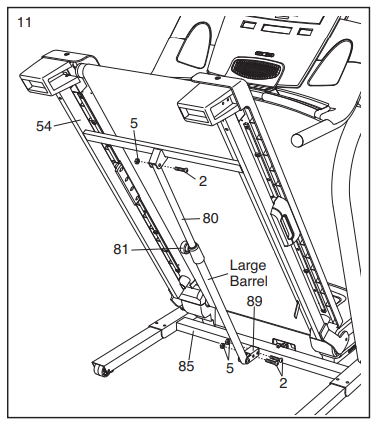
* You should have someone help hold the treadmill up while you do this.
Start by lifting the treadmill to the folded storage position. Using the hex key, remove the 2 bolts (2) and nuts (5) that attach the storage latch (80) to the bottom of the treadmill. Then remove the single top bolt (2) and nut (5) from the top of the treadmill. Then remove the storage latch.
Step 2 – Removing the Console Assembly
* Be careful when removing the Console Assembly. It is connected by a cable with a very short lead. So you will only want to pull it a few inches from the support rails. It may help to have someone there to hold this for you so you can then follow the next step.
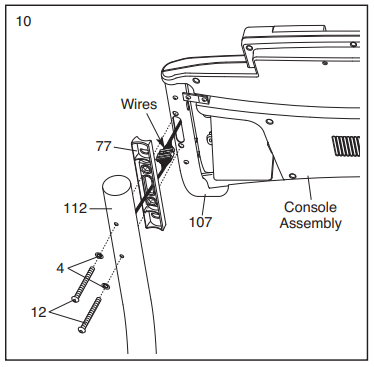
Using the hex key, remove the four bolts, two on each side (12). Including the bolts, washers (4), and Handrail Spacer (77). That connects the Console Assembly to the support rails (77). These are located on the bottom or backside of the support rails.
Step 3 – Disconnecting the Console Wire
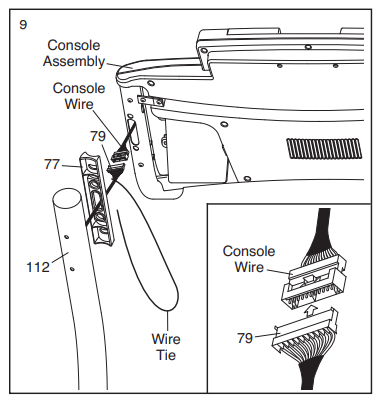
Once you have disconnected the Console Assembly and start to pull it a few inches away from the support rail (112). This will expose the Console Wire (79) connection. Once you can see it, carefully disconnect the wire.
Step 4 – Remove Left & Right Handrails (Optional)
* You can keep the handrails connected if you are just looking to move the treadmill. But if you are fully disassembling the treadmill this would be the next step.
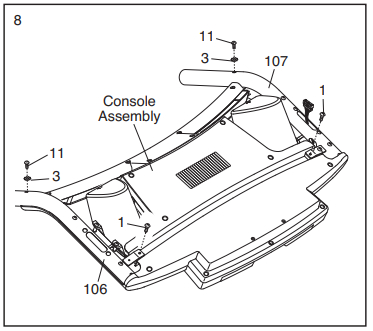
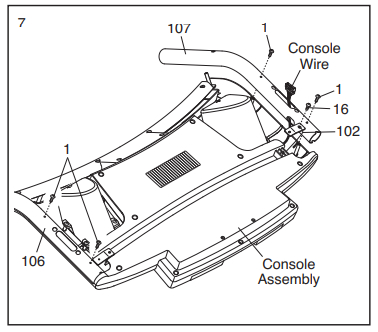
Using a screwdriver and the hex key, remove the 5 screws (3 right and 2 left) and 3 bolts (2 right 1 left) connecting the handrails (106 and 107) on the backside of the handrails / console. When removing the right hand rail be careful to run the console wire through the cable slot.
Step 5 – Remove Accessory Trays (optional)

* You can keep the accessory trays connected but if you want to fully break down the treadmill, you can follow this step.
Turn over the Console Assembly to access the screws. Using the screwdriver, remove the eight screws (7) (four on each side) holding the left (93) and right (94) accessory trays in place.
Step 6 – Remove Left Upright Rail and Wheel
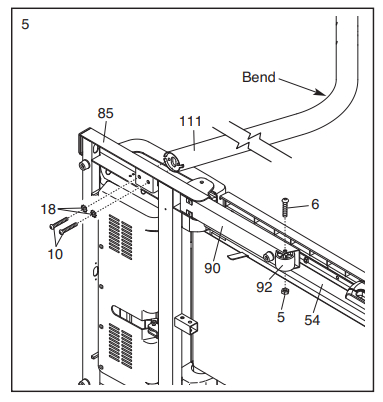
With the help of another person, carefully lay the treadmill down on its right side (as shown in the picture). Then, using the hex key, remove the two bolts (10) and washers (18) holding the upright rail (111) in place. Next using the hex key, remove the bolt (6) and nut (5) holding the left wheel in place.
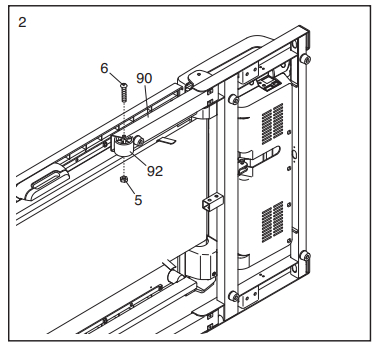
Step 7 – Remove Right Upright Rail and Console Cable

* The Console Cable (79) is going to run through the right upright rail (112). To make reassembly easier, tie a cable or cord around the top of the console cable. Then as you run the cable through the rail, attach the other end of the string to the top of the rail and the bottom of the string (running through the rail) to the bottom of the rail. So when you assemble you can attach the string to the cable and pull it though.
With the help of another person, carefully lay the treadmill down on its left side (as shown in the picture). Then using the hex key, remove the two bolts (10) and washers (18) holding the upright rail in place from the bottom of the treadmill.
Once you have removed the upright rail. Carefully run the console cable through the upright rail. Again use the string technique mentioned above to make reassembly much easier.
Step 8 – Remove the Right Wheel.
While the treadmill is still on it;s right side. Remove the bolt (6) and nut (5) holding the wheel in place.
Step 9 – Removing Base Feet (Optional)

* You do not need to complete this step to move. But it is part of the full disassembly of the treadmill.
Using the screwdriver remove the six screws (8) holding the base feet (88) and base foot spacers (87).