Looking to make a DIY resistance band bar or DIY X3 Bar? Then we’ve got you covered. For under $40 we are going to assemble a workout resistance bar using 3/4″ steel pipe and fittings. You can customize the length to your needs by choosing a 24″ (X3 Bar width) or 30″ bar if you have wider shoulders. Then using a couple of reducers and quick links and you will be ready to go. All you need is bands! Let’s get to this budget saving build.
Key Takeaways for Building Your Own DIY Resistance Band Bar:
- Create a budget-friendly DIY resistance band bar (DIY X3 Bar) for under $40.
- Customize the bar length (24″ or 30″) to suit your preferences.
- Essential materials include a 3/4″ steel pipe, reducers, nipples, quick links, and vinyl tape.
- Ensure a secure assembly using wrenches and proper tightening techniques.
- Use vinyl tape for a better grip on the bar.
- This DIY setup offers cost-effective versatility and can provide even more resistance than a commercial X3 Bar.
- Don’t compromise on the quick links’ weight capacity (up to 3300 pounds).
- Consider upgrading the bar thickness if weight is a concern.
- Overall, you can create your DIY X3 Bar for under $100, making it a cost-effective alternative to commercial options.
Building a DIY Resistance Band Bar – DIY X3 Bar
What You Need:
- 1 – 3/4″ steel pipe, 24″ long
- 2 – 3/4′ – 1/2 reducers
- 2 – 1/2″ – 1.5″ steel nipples
- 1 – Roll Vinyl Tape
- 2 – 1/2″ steel caps
- 2 – 1/2″ quick links
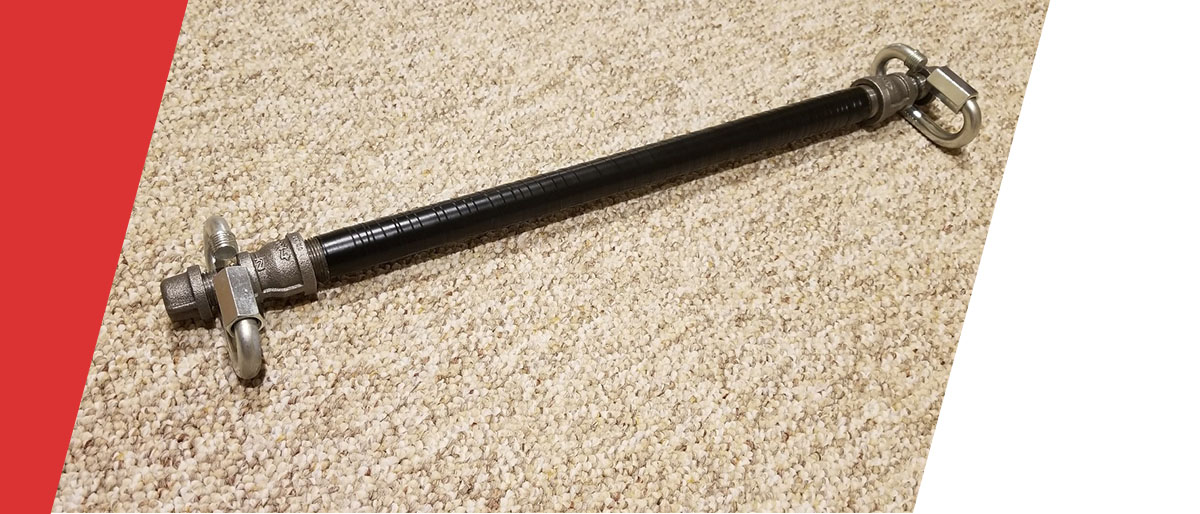
How to Build a DIY Resistance Band Bar / DIY X3 Bar:
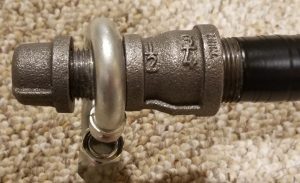
- Use a wrench to screw on the 3/4″-1/2″ reducer to both ends of the pipe.
- Use a wrench to tighten the 1/2″ – 1.5″ nipple into the reducer to make sure they are tight.
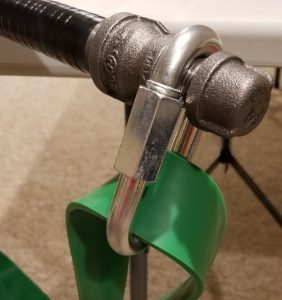
- Place one 1/2″ quick link at the end of each side.
- Use your hand to tighten on the end caps. This will ensure that if you need to remove the cap for any reason, loosening the cap won’t also loosen the nipple.
- Use a vinyl tape around the pipe as I show in the pictures. This makes it a little easier on the grip.
Final Notes:
- The quick should support up to 3300 pounds, don’t skimp here.
- If you’re worried about weight, you can up-size this entire system in bar thickness.
- Longer pipes will provide a greater initial stretch to bands, giving you even more resistance than the X3 Bar can offer.
This setup should cost under $40 to make! There are plenty of high quality resistance band loop sets you can buy for about $50. So you should be able to make your own X3 bar for under $100. Below are a couple of the best reviewed sets on Amazon.
Resistance Bands:
Conclusion
Drafting your own DIY resistance band bar, akin to the X3 Bar, is a remarkably cost-effective and customizable fitness solution. With just a handful of affordable materials and some simple assembly steps, you can create a versatile workout tool that meets your specific needs. Not only does this DIY approach save you money, but it also empowers you to tailor your resistance training to your preferences.
Remember to prioritize safety by using quality quick links that can support substantial weight, and feel free to explore different bar thicknesses for added resistance. By embracing this DIY project, you’re not just saving money; you’re investing in a fitness tool that offers flexibility, strength, and a path to achieving your fitness goals without breaking the bank. So, roll up your sleeves and embark on this budget-saving build to elevate your home workout game. Your DIY X3 Bar awaits!