Whether you’re moving to a new home or simply looking to make some adjustments to your exercise space, knowing how to disassemble a Peloton bike can be immensely helpful. Peloton bikes have become increasingly popular for their convenience and immersive workout experiences, but when it comes to disassembling them, it’s essential to have a clear understanding of the process to ensure a smooth and hassle-free disassembly. In this guide, we will walk you through the step-by-step instructions on how to disassemble your Peloton bike. Providing you with the knowledge and confidence to take apart your equipment safely and efficiently. And as always let me know any questions in the comments below.
Note: All images and instruction have been taken and revered directly from the Peloton bike assembly manual.
Official Peloton Assembly Guide Link: https://support.onepeloton.com/hc/en-us/article_attachments/11941260091284/ENG_Peloton_Bike_Self-Assembly_Guide.pdf
A Step by Step Guide on How to Disassemble a Peloton Bike
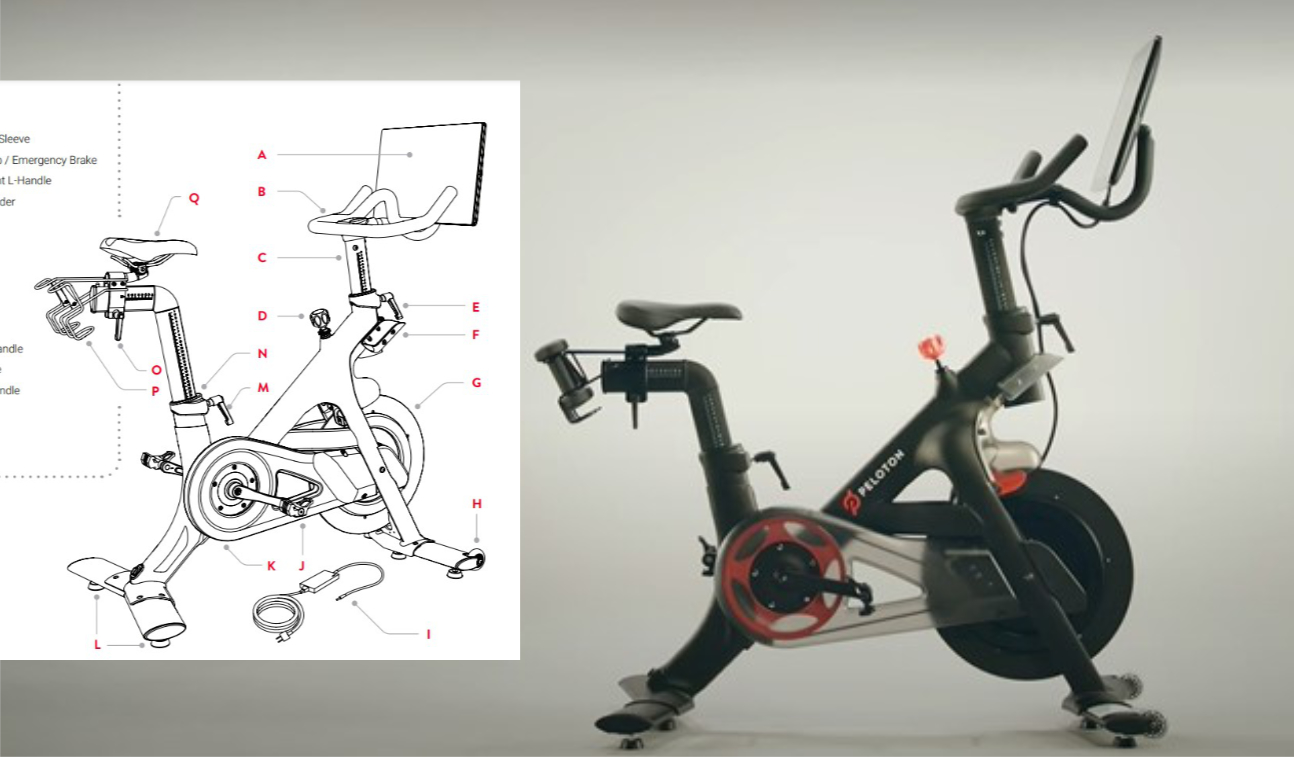
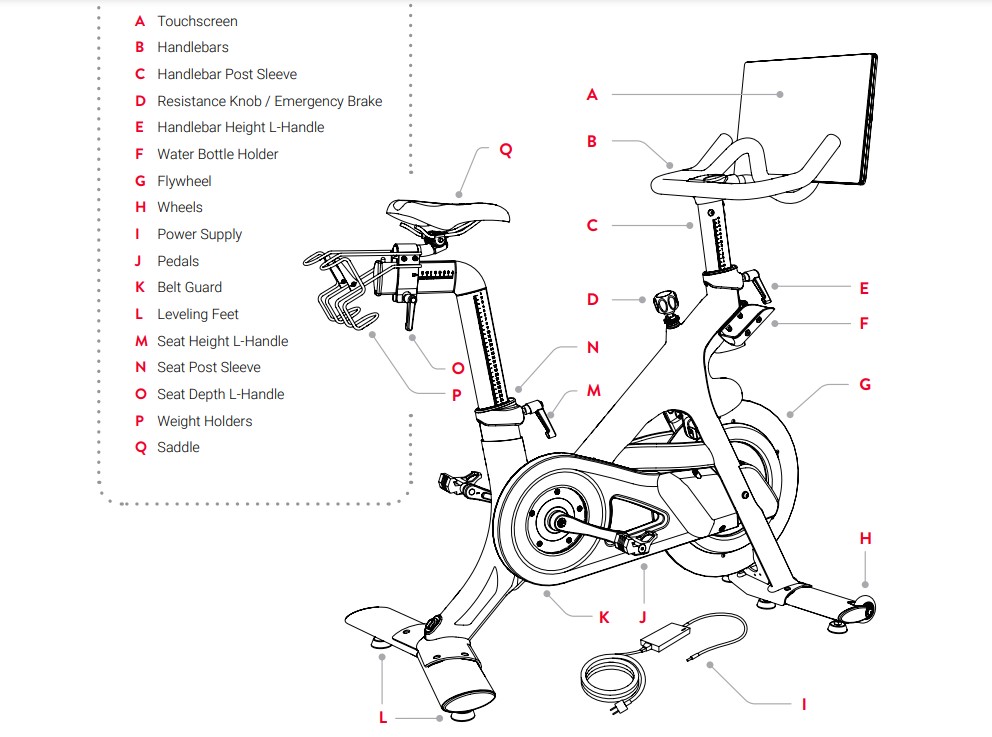
Complete Bike Image with Parts
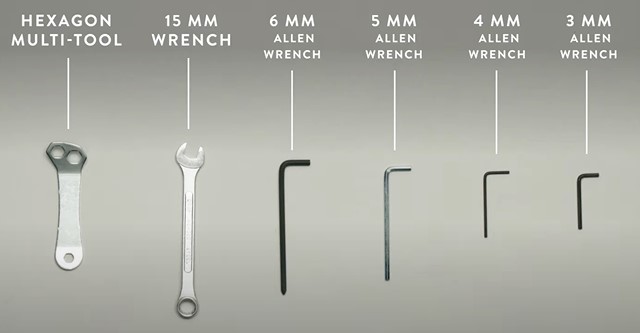
Tools Needed
Step by Step Disassembly Guide for a Peloton Bike
Step 1. Disconnecting the Touchscreen Wires

First you are going to want and disconnect the two wires that are connected into the back of the touchscreen monitor. Make sure to place these wires is a safe position so that they do not get pulled while proceeding with the disassembly of the rest of the bike.
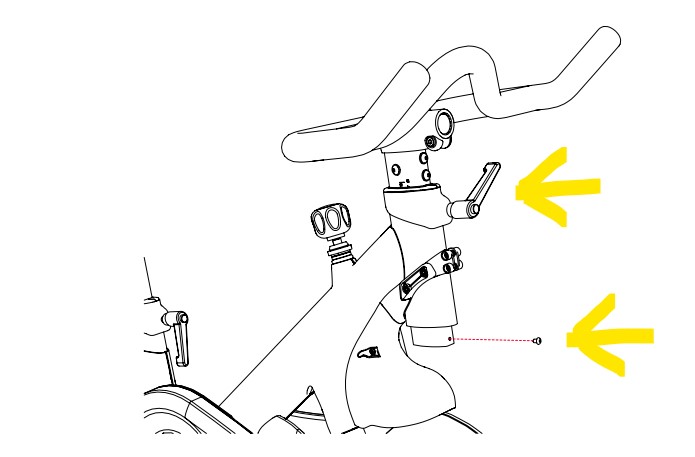
Step 2. Remove the Monitor Arm From the Handlebar Base
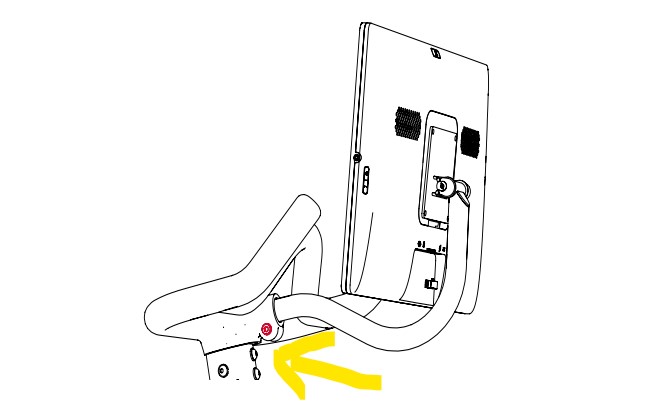
Using the 6mm Allen wrench, loosen the bolt at the base where the monitor arm going into the handle bar base. This is highlighted by the yellow arrow in the image above. Once loose, the monitor arm will just slide out of the handle bar base.
Step 3. Remove the Mounting Plate from the Monitor
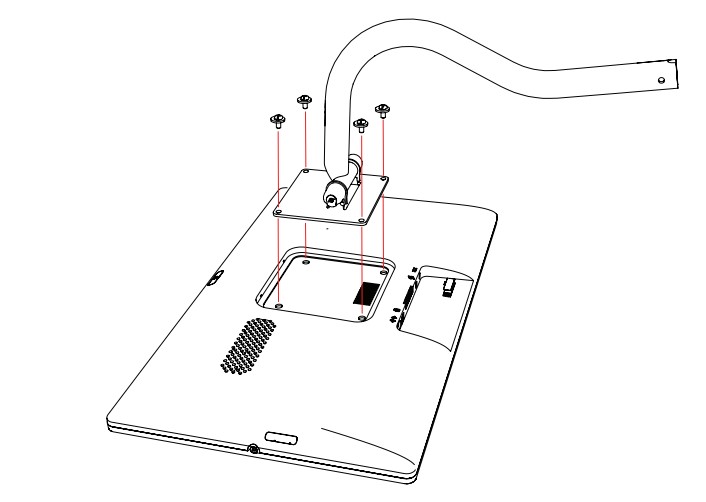
Start by laying the monitor screen down on a towel or blanket to help protect the screen. Next, using a Philips head screwdriver to remove the four bolts holding the monitor arm in place.
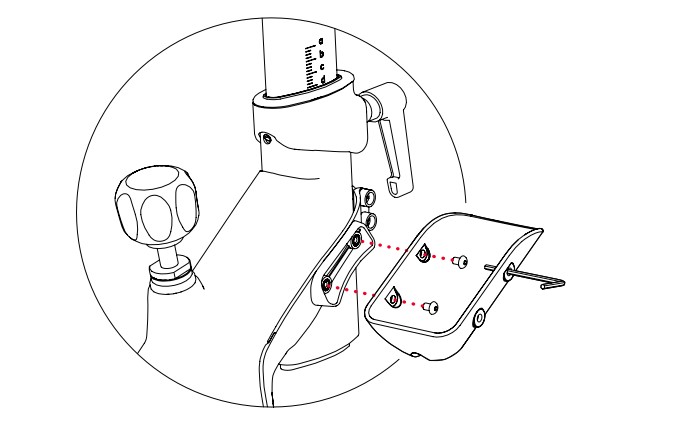
Step 4. Removing the Weight Holders
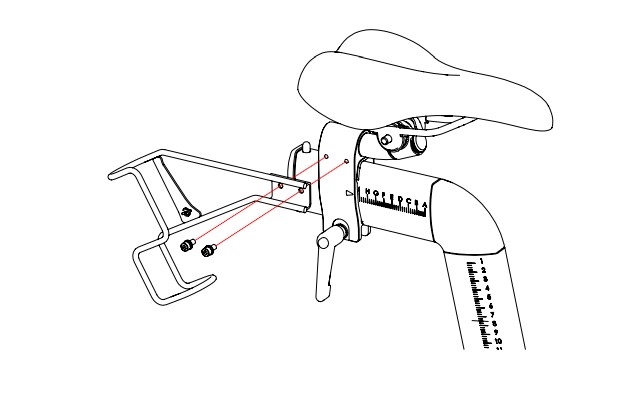
Using the 4mm Allen wrench, remove the two bolts and two washer holding the left weight holder from the seat frame. The repeat this step, removing the two bolts and washers holding the right weight holder in place.
Step 5. Uninstalling the Peloton Bike Pedals
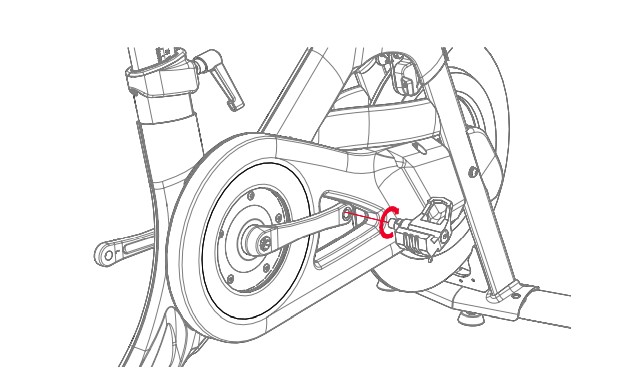
For this step you will need the pedal wrench. First start by aligning the the pedal cranks so that are both parallel to the floor. The using the pedal wrench, turn it towards the back of the bike from the top to loosen the pedal bolts. After loosened you should be able to remove them by hand. For the left pedal, you will need to turn them clockwise to remove the pedal. For the right pedal, you will need to it counterclockwise to remove.
Step 6. Removing the Water Bottle Holders
Using the 3mm Allen wrench, remove the two bolts holding the left water bottle holder in place. To do this you will fit the Allen wrench through the outer holes on the water bottle holder. Then repeat for the right side water bottle holder.
Step 7. Removing the Handlebar Post
Next we are are going to remove the handle bar post from the main bike frame. To do this, using a Phillips head screwdriver remove the bold located at the bottom of the handlebar post shown in the image above. The loosen the post using the L-handle located at the front of the bike. And then simply lift handle bar post out of the frame.
Step 8. Disassembling the Handlebar from the Handlebar Post
Using a 5mm Allen wrench, remove the four bolts and four washers connecting the handlebars from the post. To make it easier flip the handlebars upside-down so it lays on the floor. Then remove the bolts. You will find two of the bolts located at the back of handlebars, and one on each side. Once removed the handlebars should simply pull away from the post.
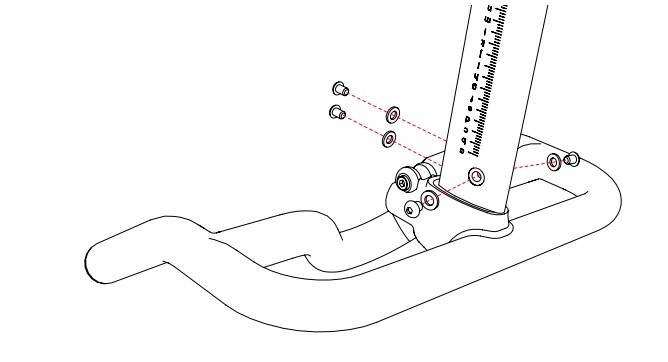
Step 9. Removing the Bottom Stabilizer Bars
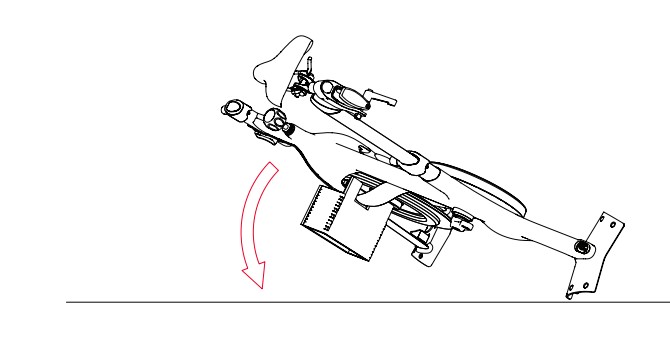
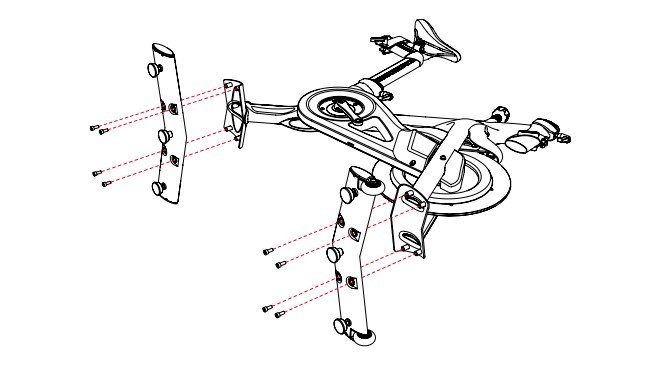
Start by gently lowering the bike onto its side as shown in the image above. Be careful not to place directly onto the flywheel. You can use a cardboard box or bundled up towel to help. Next, using the 6mm Allen wrench remove the eight bolts, four on each stabilizer. Then simply separate them from the bikes main frame.
And that’s it, you are finished!
Closing Thoughts on How to Disassemble a Peloton Bike
As you can see, learning how to disassembling a Peloton bike doesn’t have to be a daunting task. By following the step-by-step instructions and taking the necessary precautions, you can easily disassemble your bike and prepare it for transportation or storage. Remember to keep all the small parts organized and labeled for easy reassembly later on. If you ever find yourself unsure about any step, don’t hesitate to consult the official Peloton resources or seek assistance from their customer support team. With a little patience and careful handling, you’ll be able to successfully disassemble your Peloton bike and get it ready for its next adventure. Happy disassembling!