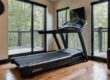
If you own a Sole treadmill, there is a good chance it will last a long time. So there is a good chance you will need to move your treadmill at some point. To make it a bit easier I’ve put together a guide for how to disassemble the Sole F80 treadmill for moving. What I’ve done is broken down the steps from the official manual in reverse and included images to make it easier to find and remove all the screws. And make sure you pay attention to the cables!
You can download the official Sole F80 Manual here.
A Step by Step Guide on How to Disassemble the Sole F80 Treadmill
Tools You Will Need
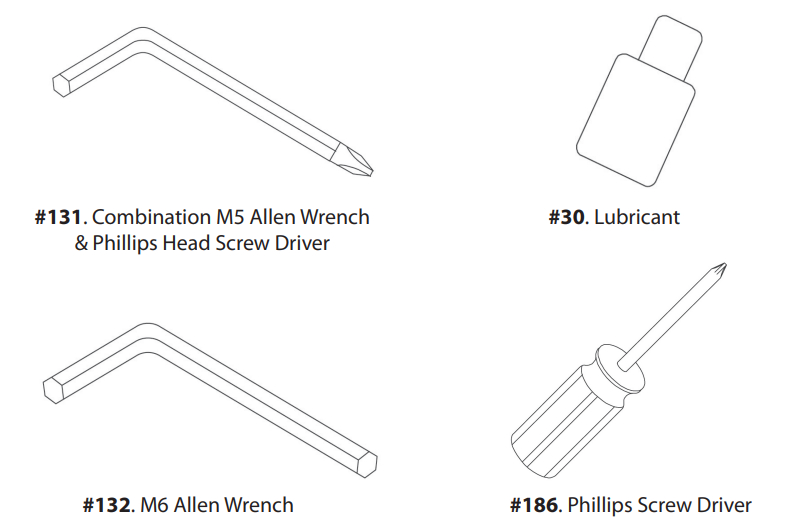
- Combination M5 Allen Wrench & Phillips Head Screw Drivers
- M6 Allen Wrench
- Phillips Head ScrewDriver
Step 1: Remove Console Mast Covers

First you are going to remove the two (61 & 62) console mast covers from the base of each side of the treadmill. To do this you will remove 6 screws, 3 from each side using the M5 allen wrench/phillips head tool. You leave the cover until you separate the side bars later in the process.
Step 2: Removing Center Support Tube
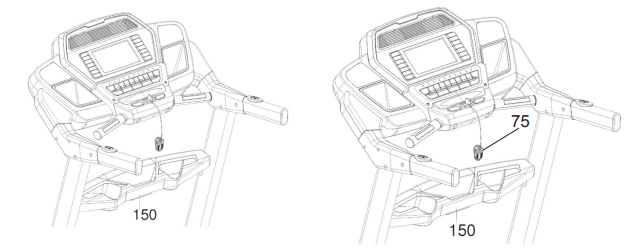
Next you are going to remove the emergency stop clip (75) and then lift the beverage holder (150) off of the center support tube. From here you are going to remove the four bolts holding the center support tube. There are two on each side (four total) button head socket bolts holding it in place.
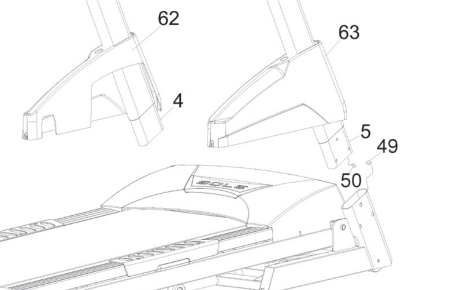
Step 3: Remove Left and RIght Side Caps
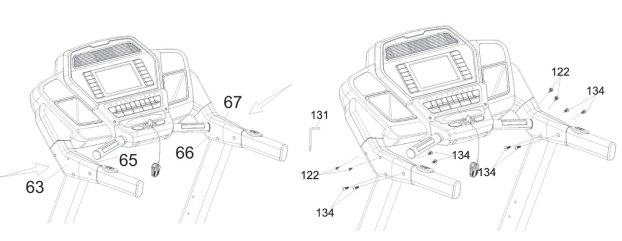
Remove the left (63 & 65) and right (66 & 67) side caps from each side of the treadmill. You will do this by removing four screws from each side, eight screws in total using the combo M5 allen wrench & phillips head screwdriver.
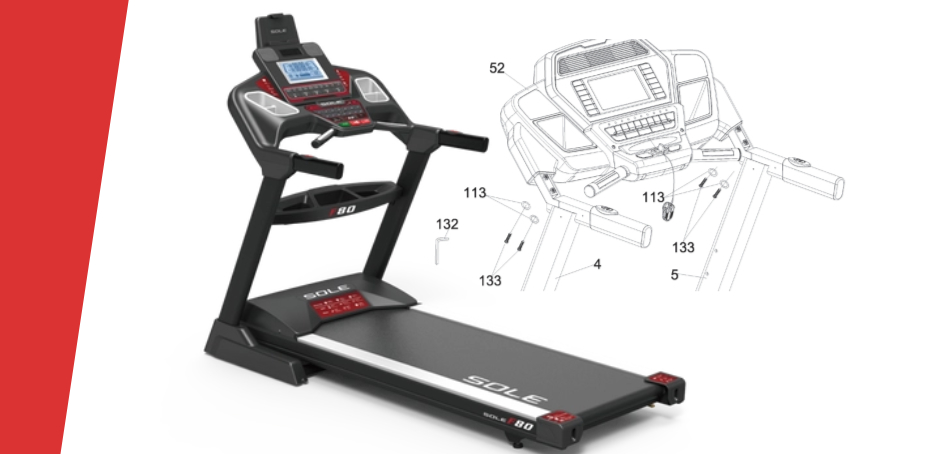
Step 4: Removing the Console Assembly
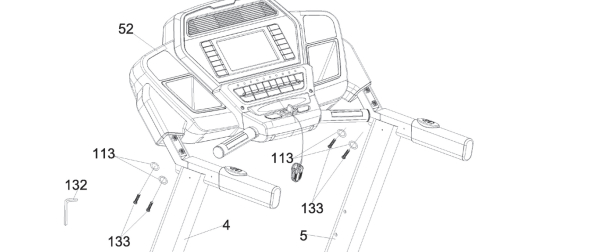
Important: For this step you will be removing the main console assembly which will be attached to the base at each side with 3 connecting points. There is a very short lead on this cable. So it is suggested you have something at the same height to set the console on or to have someone to hold it for you while you disconnect the cables.
Start by using the M6 Allen wrench to remove two main bolts (133) and washer (113) from each side. Four in total. These are located on the backside under the main console (52) where it connects to each side bar (4 & 5). Once you loosen the bolts, be ready for the next step.
Step 5: Disconnect the Cables
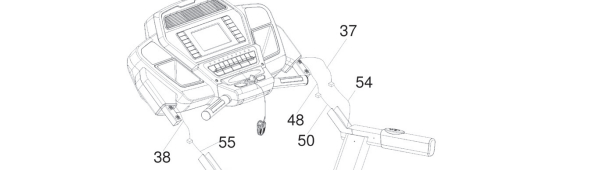
Lift the main console off of the side rails slowly and just a few inches. Then you will disconnect two cable connections on the right side ( 37/54 & 48/50) of the console and one cable connection (38/55) on the left side of the console. Then place the main console someplace safe.
Step 6: Disconnect the Side Bars
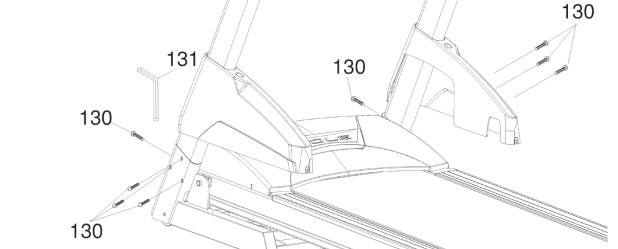
Important: There is a cable connection with a few inches of lead located at the bottom of the right support bar. Be careful when lifting this out.
First lift the mast cover where the sidebar meets the base. Then M5 Allen and Phillips head combo to remove four socket bolts from each, eight bolts (130) in total holding the side bars in place. Be careful of the cable connector on the right side bar.
Step 7: Disconnect Right Side Cable
Slowly lift the right side up and then disconnect the cable connecting the two.
Step 8: Remove Speed Nut Clips
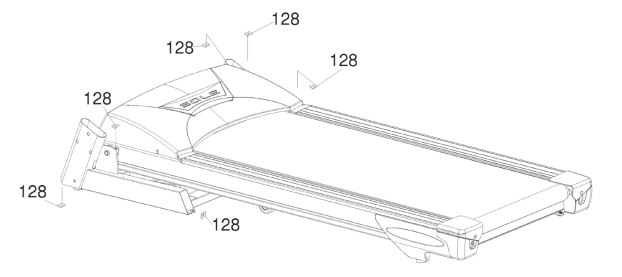
There are six speed nuts (128), three located on each side. You will see them in the image above.
Conclusion
if you own a Sole F80 treadmill and are facing the daunting task of moving it, fret not. Our step-by-step guide on how to disassemble the Sole F80 treadmill for moving will help you navigate this process smoothly. We’ve meticulously broken down the steps in reverse order, complete with images, to ensure you can easily locate and remove all the necessary screws. One crucial tip to keep in mind is to pay close attention to the cables during disassembly.
Remember, the key tools you’ll need are a combination M5 Allen wrench and Phillips head screwdrivers, an M6 Allen wrench, and a Phillips head screwdriver.
Here’s a quick recap of the steps:
Step 1: Remove Console Mast Covers. Step 2: Remove the Center Support Tube. Step 3: Remove Left and Right Side Caps. Step 4: Safely Remove the Console Assembly and Disconnect Cables. Step 5: Disconnect the Side Bars. Step 6: Disconnect the Right Side Cable. Step 7: Remove Speed Nut Clips.
By following these instructions, you’ll be well-prepared to disassemble your Sole F80 treadmill and make your next move a breeze. For further reference, you can download the official Sole F80 Manual. Happy moving!