Moving a treadmill can be a pain, especially if you are moving houses and or having to take it up or down stairs. And sometimes, the best way to move a treadmill safely involves breaking it down. Which in most cases, is much easier said than done. So to better help others, I’ve put together a guide on how to disassemble the Sole f65 treadmill for moving. Doing my best to include the needed tools, and pictures from the manual to help in the process. As always, let me know if you have any questions in the comment section below, and I’ll try my best to answer them!
You can view and download the official Sole F65 Manual here.
A Step by Step Guide on How to Disassemble the Sole F65 Treadmill
Tools You Will Need
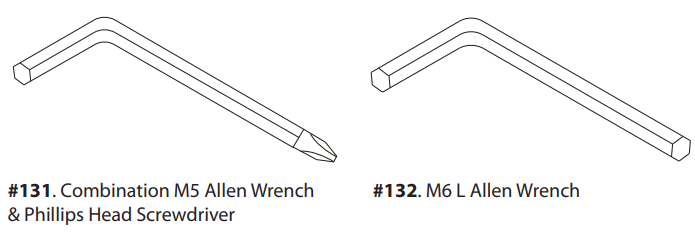
For disassembly, you will need both a Phillips Head Screwdriver and an M6 Allen Wrench.
Note before starting:
- You should not use power tools
- Make sure the treadmill is unplugged
Step 1: Remove Console Tablet Holder
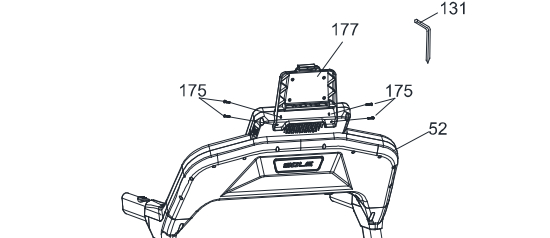
To remove the tablet holder (177), use a screwdriver or m5 combo wrench and screwdriver to remove four sheet metal screws (175) that are holding it in place. Once unscrewed you should be able to slide the tablet holder up and out.
Step 2: Unscrew Leg Console Mast Covers (Frame Base Caps)
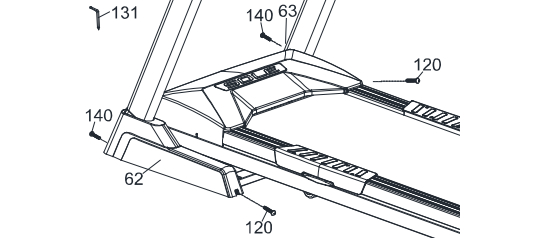
Unscrew the Console Mast Cover (62 & 63) from the Frame Base by removing two tapping screws (120) and two Phillips head screws (140) located at the front and back of the mast covers cover. Once unscrewed, these will remain on and lose until later.
Step 3: Removing Beverage Holder & Support Tube
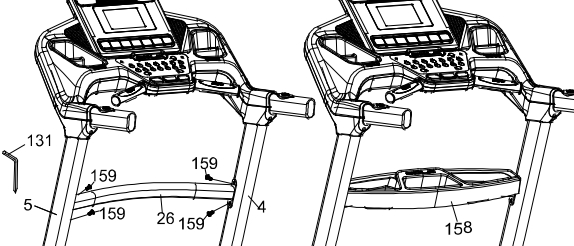
If you have not removed the treadmills safety key (75), this is a good time to do it.
To remove the Beverage Holder (158) simply lift it up off the support tube. on top of the Support tube (26). Next you are going to remove the treadmills center support tube (26) from the two upright main tube (4 & 5) supports. For this, you will need to remove the four bolts, two on each side holding the support tube in place. Once unscrewed, the support should just lift out.
Step 4: Remove Both Handlebar Covers
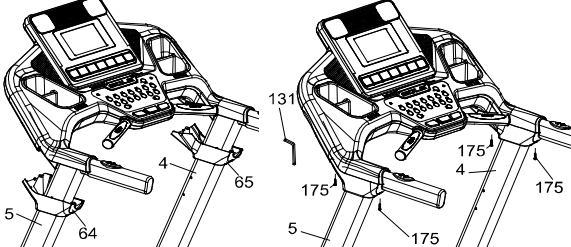
For this step you will use a Phillips Head Screw Driver (131) to remove the two Sheet Metal Screws (175) holding the Left (64) and two screws holding the Right (65) Handlebar Covers to the top of the Upright Tubes (4 & 5). Then lower them gently, we’ll remove these later in the proceses.
Step 5: Removing Console Assembly Assembly from Base
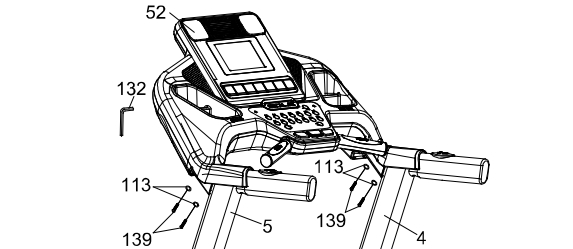
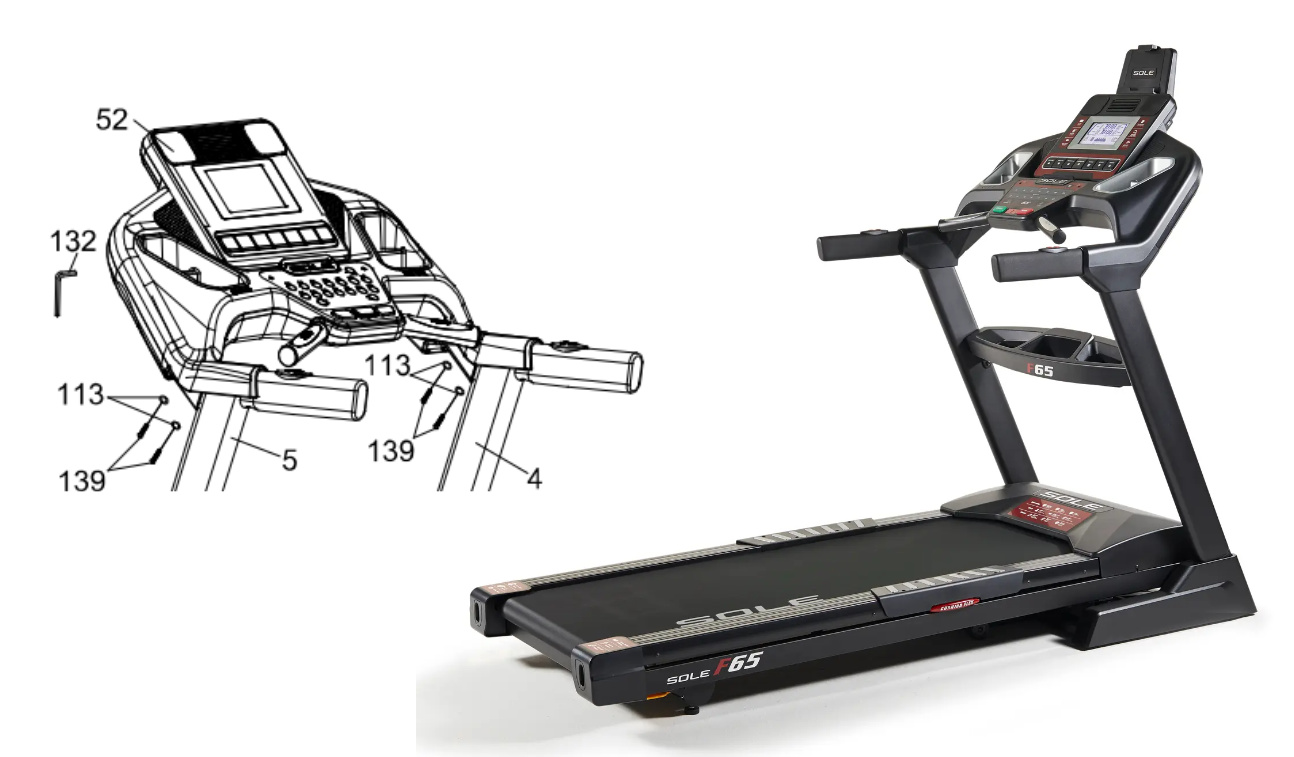
*Important* You may want to have some one help you with this next step. Once you remove the Console Assembly you want to be careful not to tear the connected wires. There is not a lot of extra length running between the connectors once you lift the console. So if you can have someone there to hold the console, or at least something to place it on very close to the base is definitely recommended.
The Console Assembly (52) is held on with four Button Head Socket Bolts (139) and four Split Washers (113) connecting it to the Upright Tubes (4 & 5). Use the M6 L Allen Wrench (132) to remove four bolts being careful to not let the console fall once unscrewed. And making sure not to pull the console wires before disconnecting them in step 6.
Step 6: Disconnect Console Cables
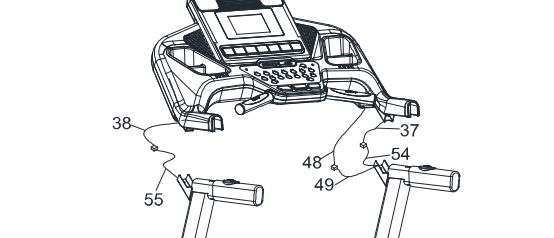
After you unscrew the console assembly, remove it slowly exposing the three cable connections. On the right disconnect the Speed Adjustment Switch Cable (54) from the Speed Cable, Upper (37) then disconnect the Computer Cable, Middle (49) and Computer Cable, Upper (48). On the left side disconnect the Incline Adjustment Switch Cable (55) from the Incline Cable, Upper (38).
Step 7: Removing the Upright Tubes from Base
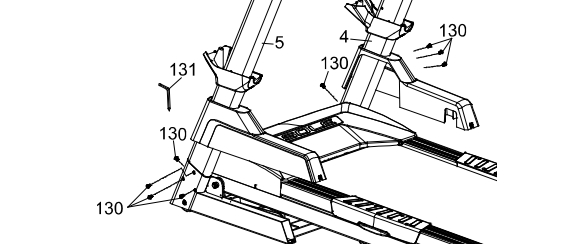
*Important* When removing the right Upright Tube (4) be careful of the cable with very little extra length. These will be disconnected in the next step.
Lift the frame base cover exposing the bolts. Using the 5M Allen wrench (131), you are going to remove the eight Button Head Socket Bolts (130). Four on each that connect the Upright Tube (4 & 5) that connect them onto the Frame Base (2). Once removed, just lift the lift the tubes carefully exposing the wire connection.
Step 8: Disconnect Cables and Remove Caps
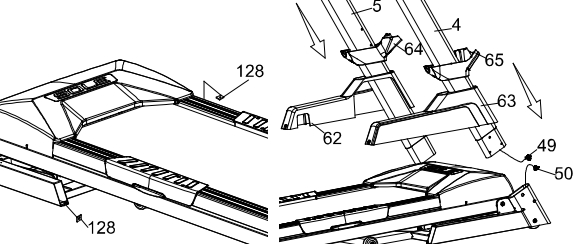
Carefully lift the uprights exposing the cable connector, and then disconnect the Lower Computer Cable (50) to the Middle Computer Cable (49) located on the right side of the unit. Next, and this is minor, but you will remove the Frame Base Caps (62L & 63R) and the lower handlebar covers (64 & 65). And the last step remove the two Speed Nut Clips (128) on the left and right sides of the Frame Base.
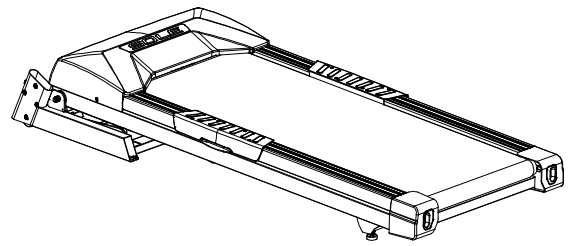
And that’s how to disassemble the Sole f65 treadmill for moving! You now be just have all of the pieces and the base motor and tread unit. Which should be much easier to transport.
Let me know if you hve any question in the comments below!