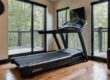
Everyone knows that moving a treadmill can be a pain. Especially if you are taking it up or down stairs, or making a more long distance move from one house to another. So to help make it as easy as possible I’ve taken the time to reverse engineer the assembly instructions specifically for the Horizon t101. Providing a complete guide on how to disassemble the Horizon t101 treadmill for moving. Including pictures and tools needed straight from the official manual. If you have any questions, let me know in the comments below and I’ll do my best to get the answers for you!
A Step by Step Guide on How to Disassemble the Horizon t101 Treadmill
Below we will cover the tools needed and step by step instruction reverse engineered directly from the owner’s manual (including pictures).
Tools Needed for Disassembly
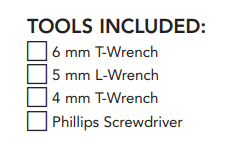
- 6 mm T-Wrench
- 5 mm L-Wrench
- 4 mm T-Wrench
- Phillips Screwdrive
- Something to store loose screws, washers, and bolts
These would have been included with the original assembly kit. Or you can pick up a simple hex wrench set and Phillips head screwdriver from Home Depot.
Disassembly Steps
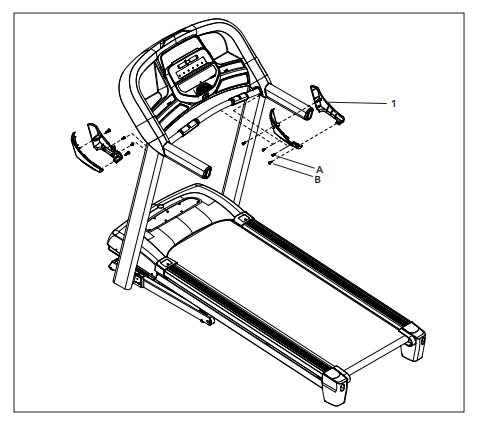
Step 1 – Remove Left and Right Console Joint Covers
Using a screwdriver, you will need to remove 4 screws (A & B) from the inside of both the right and left console joint covers. That is 8 screws in total.
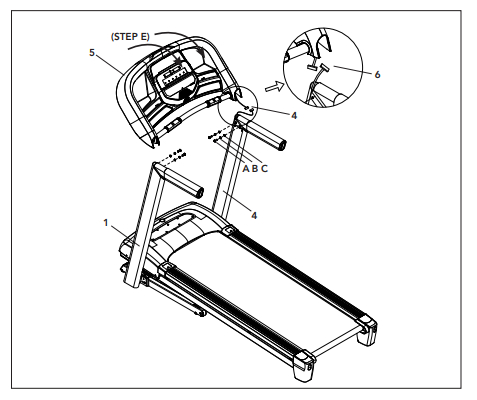
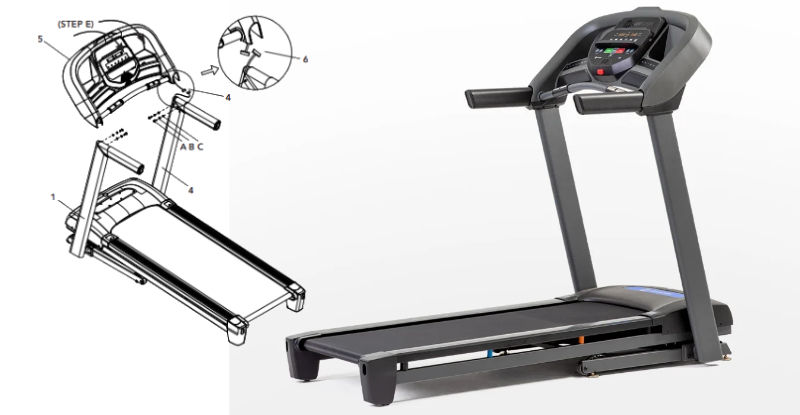
Step 2 – Remove the Console from the Masts
Note: Once you unscrew and lift off the console (5) there is a cable connection that needs to be disconnected (6). Be careful not pull the console too far from the masts. You may want to have someone help hold the console while you do this.
Each side of the console is connected to the masts with 2 hex bolts (A), washers (C), and washer springs (B). Using the Unscrew and remove these bolts, carefully holding the Console (5) in place. The slowly lifting the console to reveal the console cable connecting on the right side (6).
Then disconnect the Console Cable.
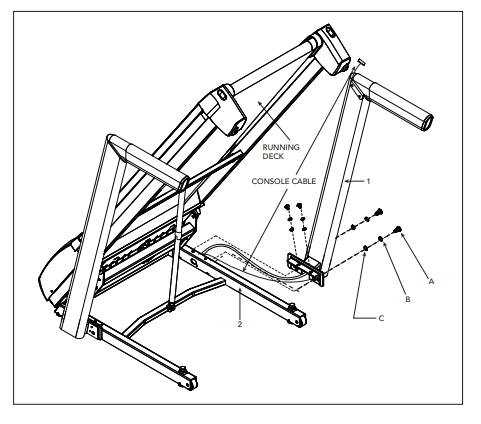
Step 3 – Remove Right Side Console Mast and Console Cable
Note: To make reassembly easier tie a string to the Console Cable and take one side of the string to the top of the right console mast. Then, as you pull the Console Cable through, allow the tied side of the string to go with it. Once through, untie the cable and tape that side of the string to the bottom of the right console mast. This way you can tie and pull through the Console Cable on assembly.
The right Console Mast is connected by 4 hex bolts (A), spring washers (B), and washers (C) . Using a hex screwdriver remove the 4 bolts and washers. After this, run the Console Cable through the right mast. Use the tip noted above for easier assembly.
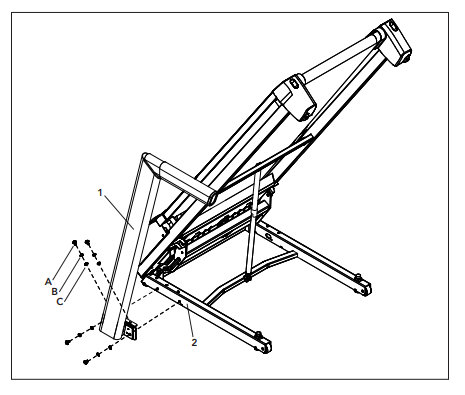
Step 4 – Remove Left Side Console Mast
The left side COnsole Mast (1) is held together by 4 hex bolts (A), spring washers (B), and washers (C) . There is no cable running through this side so simply remove the hex scres and washers and you are done with this side.
Step 5 – You’re Done!
Conclusion – Quick Review on Hot to Disassemble the Horizon t101
Moving a Horizon T101 treadmill doesn’t have to be a daunting task. To simplify the process, we’ve reverse-engineered the assembly instructions from the official manual, complete with pictures and tools needed. Here’s a concise summary:
Tools Needed for Disassembly:
- 6 mm T-Wrench
- 5 mm L-Wrench
- 4 mm T-Wrench
- Phillips Screwdriver
- Something to store loose screws, washers, and bolts
Disassembly Steps:
1 – Remove Left and Right Console Joint Covers Using a screwdriver, remove 4 screws from inside both the left and right console joint covers (8 screws in total).
2 – Remove the Console from the Masts
- Unscrew and remove 2 hex bolts, washers, and washer springs from each side of the console.
- Carefully lift off the console, being mindful of the cable connection on the right side. Disconnect the console cable.
3 – Remove Right Side Console Mast and Console Cable
- Tie a string to the console cable and run it through the right console mast. This string will help with reassembly.
- Remove 4 hex bolts, spring washers, and washers from the right console mast.
- Run the console cable through the mast, following the string you tied for guidance.
4 – Remove Left Side Console Mast
- Remove 4 hex bolts, spring washers, and washers from the left console mast.
5 – You’re Done!
With these simple steps, you’ll have your Horizon T101 treadmill disassembled and ready for a smooth move. If you have any questions, feel free to ask in the comments below. Safe moving!