One of the biggest advantages of buying a Sole treadmill is the warranty, and knowing that it’s going to last for years. The one downside is that there is a decent chance you will need to move the treadmill at some point during the long lifespan. But have no fear, taking apart a treadmill isn’t as hard as it sounds. And using this guide on how to disassemble a Sole F85 treadmill for moving, it’s even easier. With images taken directly from the manual and list of tools needed, You should have everything you need to get going!
You view and download the official Sole F85 Manual here.
A Step by Step Guide on How to Disassemble a Sole F85 Treadmill
Tools Needed
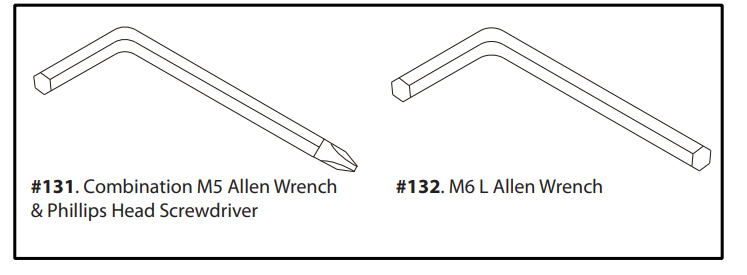
- Combination M5 Allen Wrench & Phillips Head Screw Drivers
- M6 Allen Wrench
- Optional – Phillips Head Screw Driver
Step 1: Remove Tablet Holder
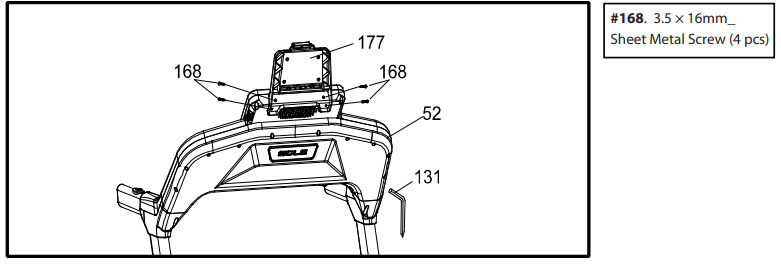
Our first step will be to remove the tablet holder (177) from the top of the Console Assembly (52). It is held in place with four sheet metal screws (168). Two on each side of the holder. And can be removed with a Philips head screwdriver.
Step 2: Remove Beverage Holder and Support Tube
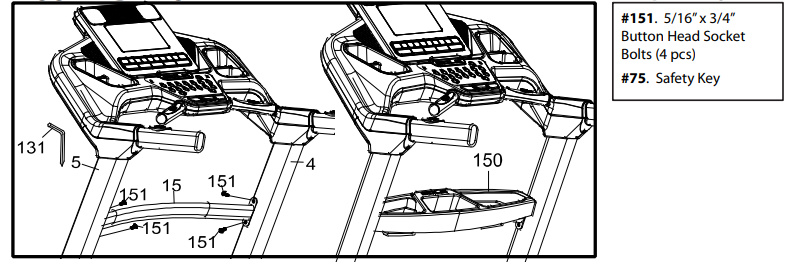
Step two is broken into two parks, removing the beverage holder (150), attached atop the Support tube (15). Which we will also be removing. First, the beverage holder (150) should just lift off of the support tube. Next, for the support tube (15) we will remove four bolts (151), two from each side.
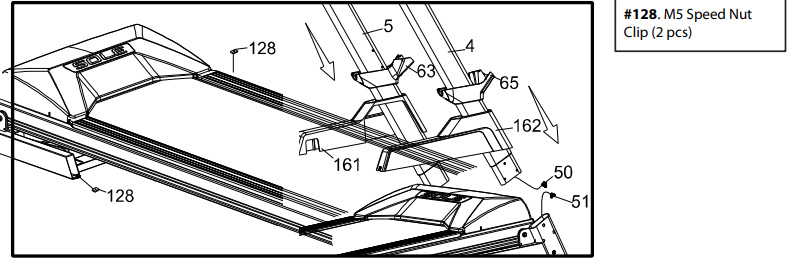
Step 3: Remove Left and Right Console Mast Covers

Third we are going to remove the left (63) and right (64) Console Mast Covers. This is the plastic piece around the upright tubes (4,5), that is attached under the console handrails to cover the bolts. Each is held in place with two screws (168), use a Phillips head screwdriver to remove these. And gently lower the Mast covers, we’ll remove these later.
Step 4: Removing the Main Console Assembly
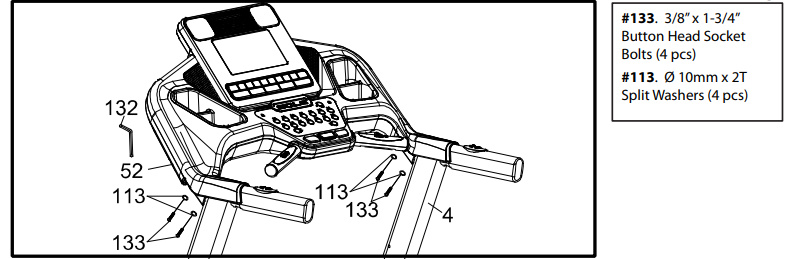
Important: The main console is connected to the upright tubes by wires on both sides. So you can’t pull it far before having to disconnect them. There is only a few inches of lead. Because of this and the weight of the console it really helps to have two people. One to unscrew the main console and the other to hold the main console. You have been warned!
For this step we will be removing the Main Console (52) from the Upright Tubes (4 & 5). Which is attached with four bolts (133) and washers (113). Two located on each side, one the bottom of the backside of the main console. For this you will need the M6 Allen Wrench. And as mentioned above, it really helps to have two people for this.
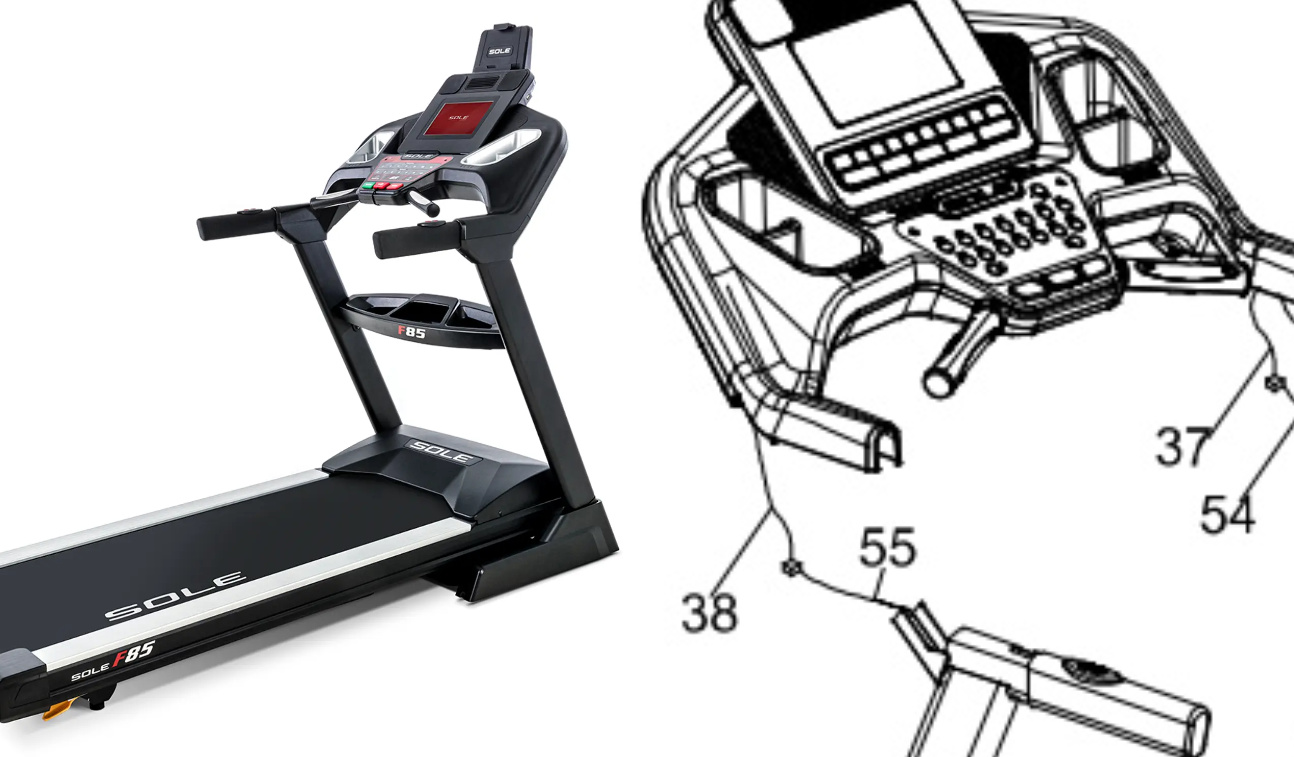
Step 5: Disconnect the Cables from the Main Console
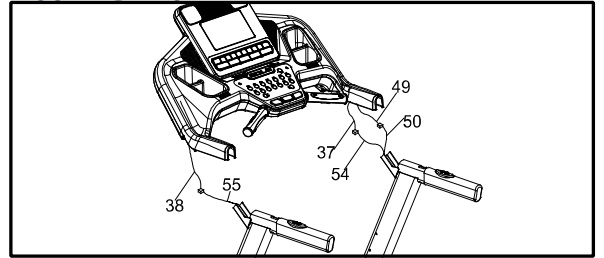
After you have disconnected the four bolts holding it in place. Slowly lift the Main Console (52) exposing the wire connectors on both sides. While not moving the main console too far away. Disconnect the left wire (38 & 55). And the disconnect the two cable connections on the right (37 & 54, 49 & 50). Then place the main console someplace safe for storage or moving.
Step 6: Remove Left & Right Upright Tubes
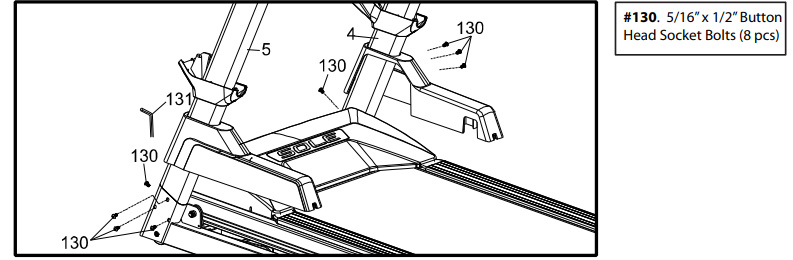
Important: There is a cable running through the right Upright Tube (4). This connection only has a few inches of lead, so be careful when lifting this out.
You will first start by lifting the console mast covers from the very bottom of the upright tubes (4 & 5). Allowing access to the screws holding them in place. Each upright tube is held in place with 4 bolts (130, eight in total). Thee on the side and one on the front of the treadmill. Once you remove the screws you can lift and remove each upright tube by lifting it straight off the rail it was screwed into.
Reminder: There is a cable running out the bottom of the right upright tube (4). So be careful when pulling up this support.
Now just unconnect the cable and you are finished!