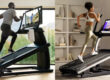
Moving or disassembling a treadmill is never easy. But have no fear, I’ve got you covered with a quick and easy guide to how to disassemble a Proform 995 Treadmill for moving. Below I’ve broken down the assembly instructions in reverse and include images to make it as easy as possible. If you have any questions or would like instructions for another treadmill model, let me know in the comment section below!
Link to Proform 995 Manual click here.
A Step by Step Guide on How to Disassemble a Proform 995 Treadmill
Tools Needed

- Disassembly requires:
- Hex Key
- Phillips Screwdriver
- Adjustable Wrench
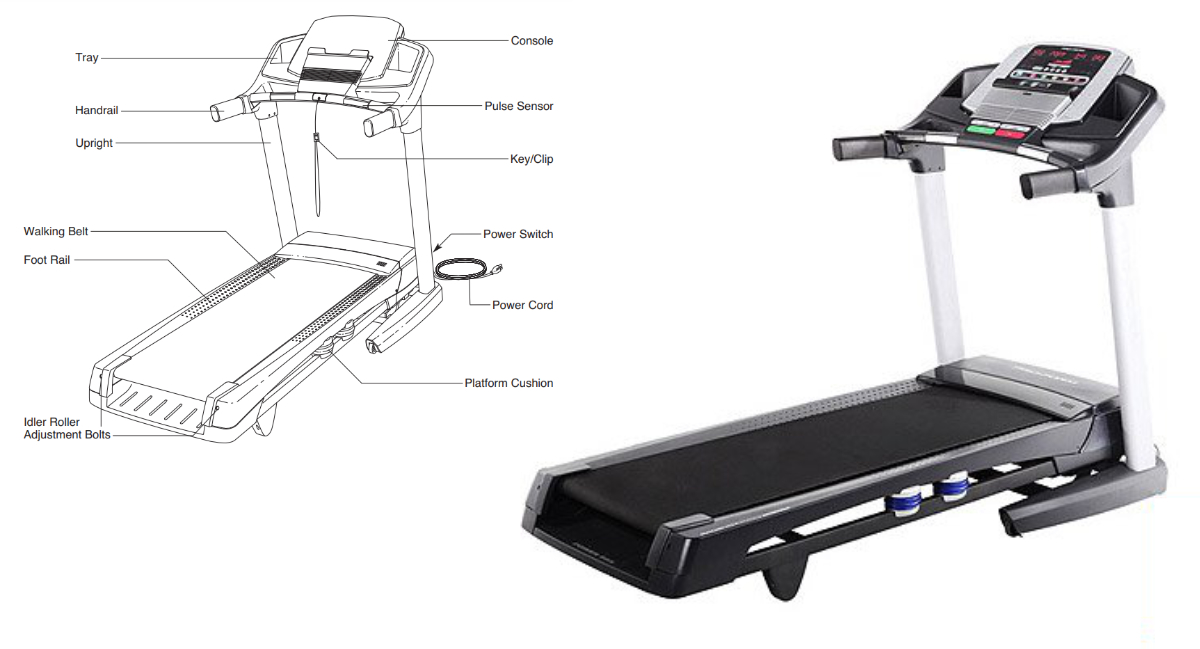
Step 1. Remove the Rear Feet From the Frame
First lift the treadmill to the upright / folded position. Then using a screwdriver remove the four screws(2), two on each side, and remove the two Rear Feet (57) from the frame (56)
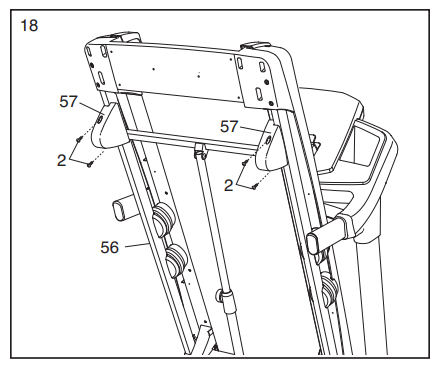
Step 2. Remove Folding Storage Latch
* You may want to have someone help hold the treadmill up for this next step.
Lift the treadmill deck so that it is in the upright / folded position. From here you are going to remove the Storage Latch Bar (53) by removing the nut and bolt that connect the top (12, 6) and bottom (12, 3) of the treadmill’s frame.
Step 3. Remove the Left and Right Console Treys
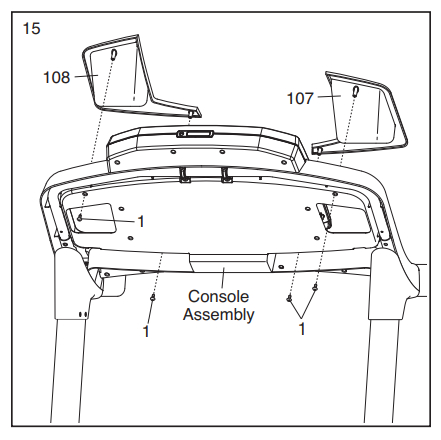
To remove the Left and Right Console Treys (108,107), you will need to remove four screws (1) from the backside of the main control console. Then lift the treys out.
Step 4. Remove Left and RIght Upright Covers
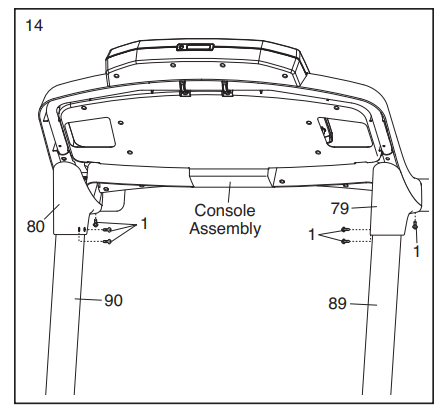
Next we will remove the left and right upright covers that attach to the bottom of the Console Assembly. To do this just remove the three screws (1) holding both the left (79) and right (80) Upright Covers in place to the main uprights (89,90).
Step 5. Remove Left and Right Handrail Covers
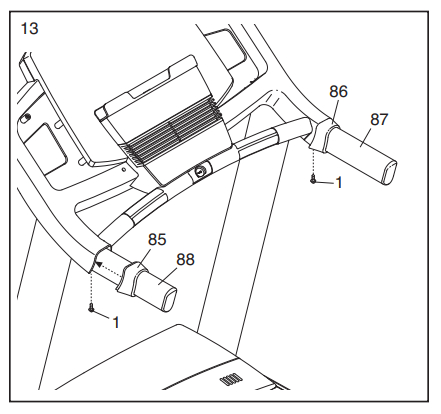
On each handrail there is a cover connecting to the Console Assembly. You can remove both of these by removing one screw (1) from each side and sliding off the left (85) and right (86) handrail covers.
Step 6. Removing Left and right Base Covers
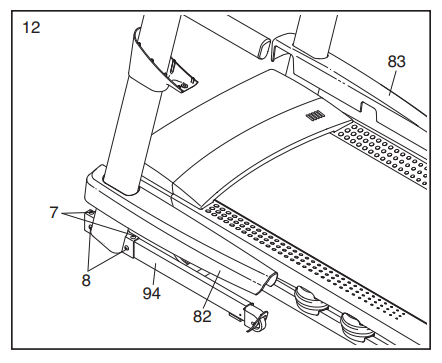
The Left (82) and Right (83) base covers snap into place so you want to be careful when taking them off. To get them off you will need to pull out and then lift from the bottom of the base covers. So “un snap” them from the base.
Step 7. Remove Console Assembly from Support Rails
* Be careful when removing the console assembly. There is a cable connected to it that runs down the left frame rail. So when you remove the console assembly, only pull it an inch or two off of the rails so you can access the cable connection.
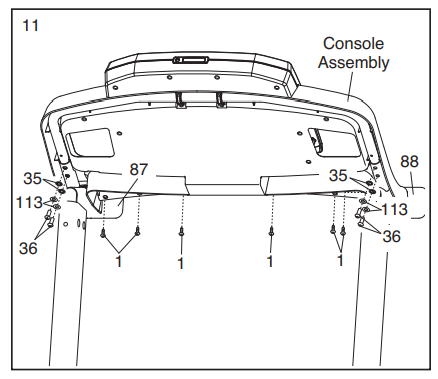
To remove the Console Assembly, you will need to remove 10 total screws from the backside of the console. This includes six half inch screws (1) and four bolts (36) along with the accompanying washers (35).
Step 8. Disconnect Console Wire
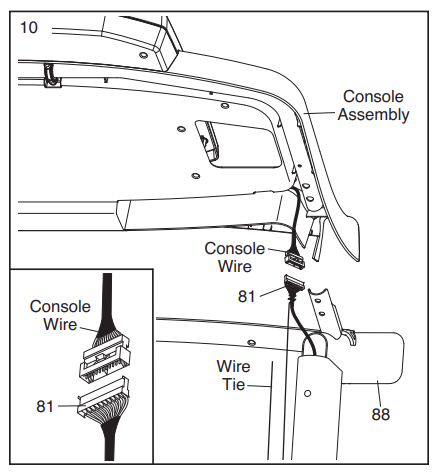
Be careful when removing the console assembly not to pull too far and break the console wire. Only pull it off the rails a few inches exposing the console wire connection. From here disconnect the cable and place the Console Assembly someplace safe. Wrapping it in a blanket for protection is a good idea.
Step 9. Remove Crossbar
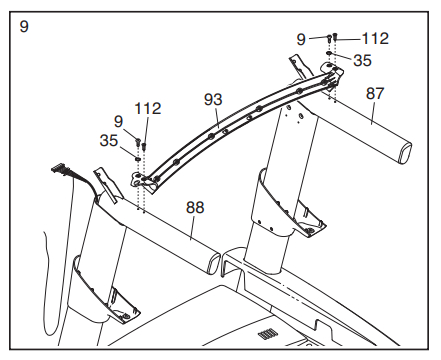
To remove the crossbar, unscrew the two flat head screws (112) and the screws (9) and washers (35) connecting the crossbar to the two handrails.
Step 10. Remove Left and RIght Handrail

* The console wire runs through the left hand rail, so be careful when removing it.
The remove the handrails, just remove the four bolts (5) and washers (11). Two on each side. Then lift the handrails up and out of the upright supports. Remember the console wire runs through the left hand rail. Carefully remove the wire from the left handrail.
Step 10. Slide Off the Left and Right Base Covers.
Simply slide off the left and right base covers. And put them somewhere so they won’t get broken.
Step 11. Remove Left and RIght Upright Supports
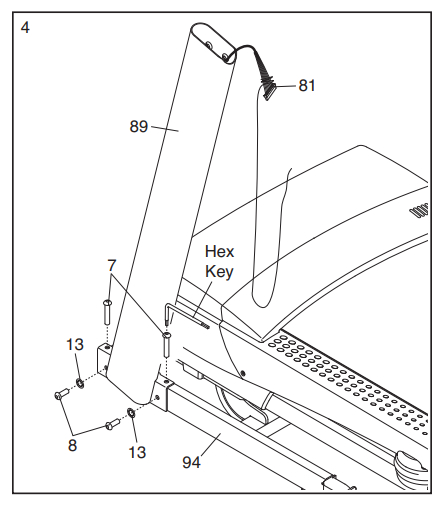
* Remember the Console Wire runs down the left upright, so be careful when removing it not to pull the wire.
Both the left and right uprights are held in place by four bolts (eight total). Two bolts (7) on top and two bolts (8) and washers (13) on the sides.
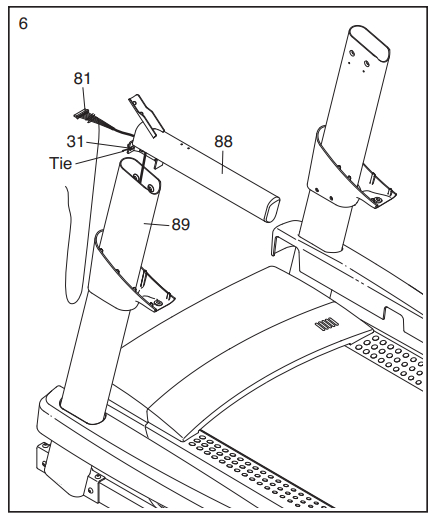
Step 12. Running Console Wire Through the Left Upright
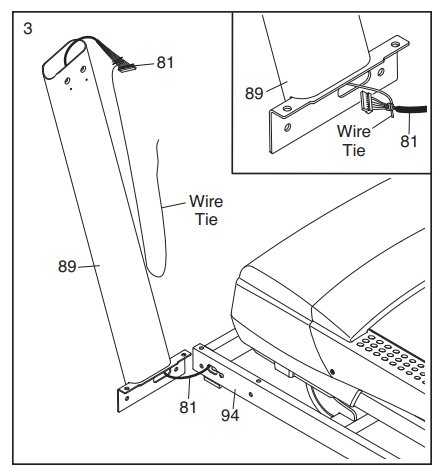
* Tip: Tie a string or cord to the top console wire cable, long enough to run the entire length of the left upright. So that when you run the cable through the upright, you can attach one end of the string to the top and one to the bottom. So that when reconnecting, you can tie the string to the Console Cable and pull it through the upright.
To remove the Console Wire, carefully run it through the left upright.
Step 13. Disconnect the Ground Wire and Run Through Base
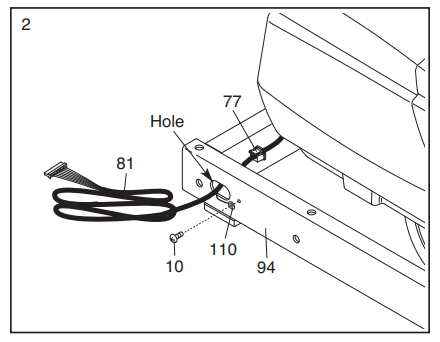
First unscrew the base wire (10) from the base (110). Then run the console cable through the hole in the frame for safe moving.
Step 14. (Optional) Remove Wheels
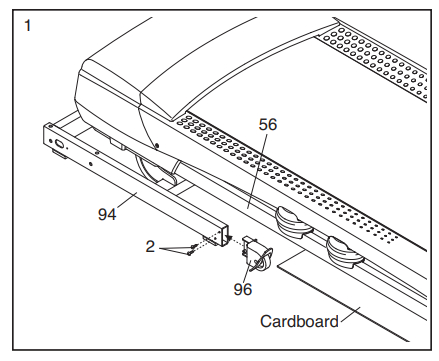
To remove the wheels, remove the two screws (2) holding each wheel in place to the frame (94).
If you have any questions on how to disassemble a Proform 995 Treadmill for moving, let me know in the comments below.
Conclusion
Disassembling a ProForm 995 treadmill for moving can be made easier with our step-by-step guide, which reverse-engineers the assembly instructions from the official manual. Here’s a concise summary:
Tools Needed for Disassembly:
- Hex Key
- Phillips Screwdriver
- Adjustable Wrench
Disassembly Steps:
1 – Remove the Rear Feet From the Frame Lift the treadmill to the upright position and remove four screws (two on each side) to detach the two Rear Feet from the frame.
2 – Remove Folding Storage Latch
- Lift the treadmill deck to the upright position.
- Remove the Storage Latch Bar by unscrewing the nut and bolt connecting the top and bottom of the treadmill’s frame.
3 – Remove the Left and Right Console Trays Unscrew four screws from the backside of the main control console to detach the Left and Right Console Trays.
4 – Remove Left and Right Upright Covers Remove three screws holding both the Left and Right Upright Covers to the main uprights.
5 – Remove Left and Right Handrail Covers Remove one screw from each side to slide off the Left and Right Handrail Covers.
6 – Removing Left and right Base Covers Carefully unsnap the Left and Right base covers by pulling them out and lifting from the bottom.
7 – Remove Console Assembly from Support Rails
- Remove 10 screws from the backside of the console, including six half-inch screws and four bolts.
- Carefully pull the Console Assembly an inch or two off the rails to access the cable connection.
8 – Disconnect Console Wire Disconnect the console cable carefully to remove the Console Assembly and place it in a protective blanket.
9 – Remove Crossbar Unscrew the two flat-head screws and the screws and washers connecting the crossbar to the handrails.
10 – Remove Left and RIght Handrail
- Remove four bolts (two on each side) and washers.
- Lift the handrails up and out of the upright supports while carefully removing the console wire from the left handrail.
11 – Slide Off the Left and Right Base Covers Slide off the Left and Right base covers and store them securely.
12 – Remove Left and RIght Upright Supports Remove eight bolts (four on each side) holding the left and right upright supports in place.
13 – Running Console Wire Through the Left Upright Carefully run the console wire through the left upright. Consider using a string or cord for ease of reassembly.
14 – Disconnect the Ground Wire and Run Through Base (Optional) Unscrew the base wire from the base and run the console cable through the hole in the frame for safe moving.
15 – (Optional) Remove Wheels Remove two screws holding each wheel in place to the frame if desired.
With these steps, you’ll be well-prepared to disassemble your ProForm 995 treadmill for a smooth move. If you have any questions or need further assistance, feel free to ask in the comments. Safe moving!