One of the best ways to step up your body weight fitness is to start incorporating suspension training. And to help you with this I’m going to show you how to build your own DIY TRX straps for under $20. Rather than paying over $100 for the name brand. Making them is actually very simple and there is a great video online showing the step by step guide. Which I’ve included below. So, let’s get started!
Key Takeaways:
- Save money by building your own DIY TRX straps for under $20 instead of buying expensive brand-name ones.
- Creating DIY TRX straps is a simple process involving knot tying and PVC pipe handles.
- You can customize the length of your straps for versatile suspension training.
- Follow the step-by-step guide provided in the article or watch a video tutorial for detailed instructions.
How to Build DIY TRX Straps
What you Need
Box Cutter, Knife, or Sharp Scissors
Hand Saw
3/4″ PVC Pipe – two 1′ pieces (2′ total)
Two 15′-20′ pieces of webbing strap – 1,000lb Capacity
Lighter
Putting it all Together
I’m going to preface this by saying that this is going to be a lot of knot tying but over all the DIY TRX straps are an easy build. It may take a few tries, but you can always back track and retry. You really can’t mess it up so don’t worry if it sounds confusing on the first try.
Building the Main Strap
1. If you are using tied down straps, the first thing you are going to do is cut off the loop/hook ends. Then use the lighter to burn the end to prevent it from fraying.
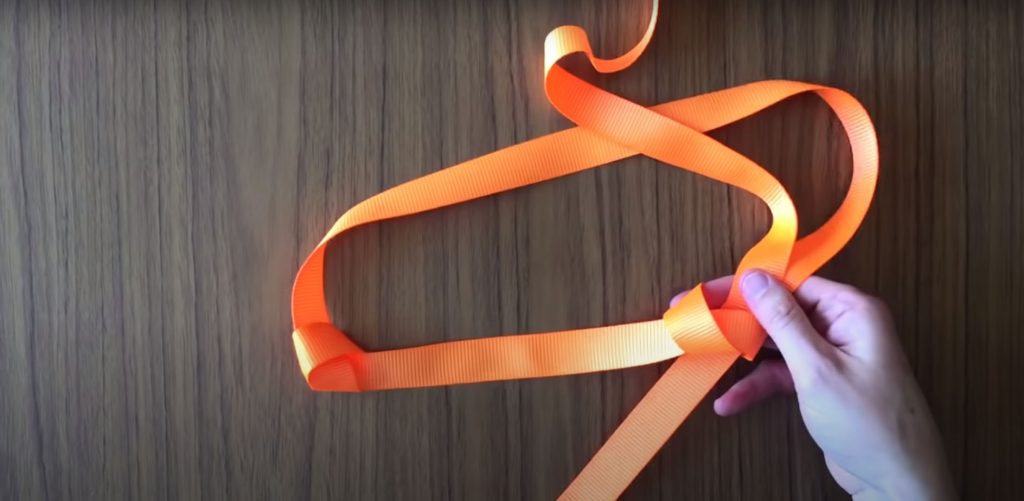
2. Find the midpoint in your strap. Then roughly 6 inches from the mid point, tie a simple overhand knot on both sides. So that if you find the midpoint again, there are now two knots 6 inches on either side of it.
3. Lay out your strap in front of you in a “U” shape with the knots at the corners.
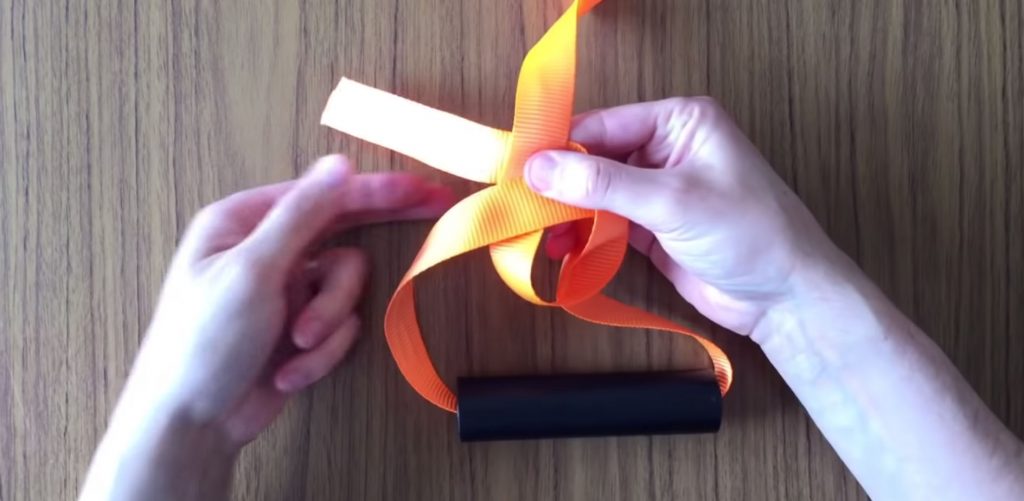
4. Lay one of the working straps across and under the other strap. Then run it through the bottom knot of the side it is currently on. If you fold the left side under the right side, the left strap will run through the right side knot. This will create loop and you are going to want to leave a little slack.
5. Then loop this strap back around the same knot again. Running through the middle of the now created loop around and then runningthe strap back through the middle of the same knot. running the strap through and tightening it down.
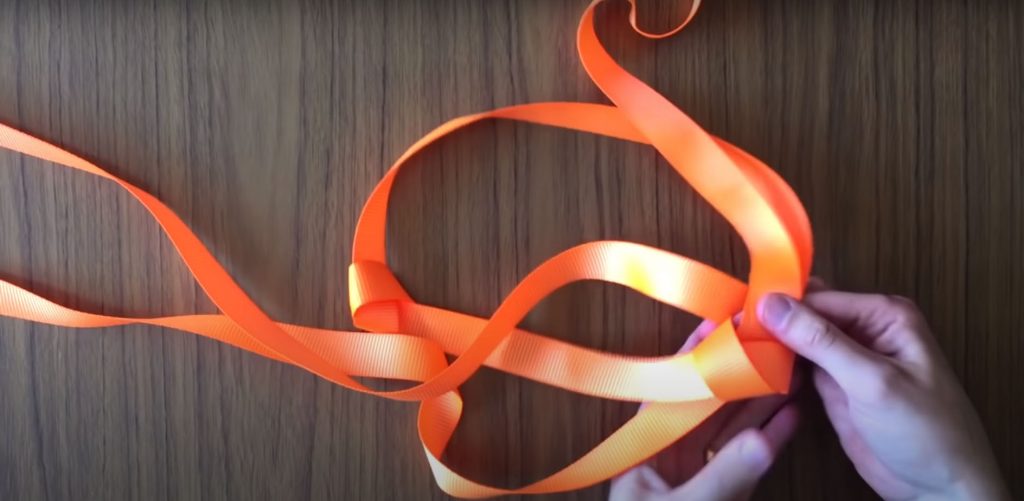
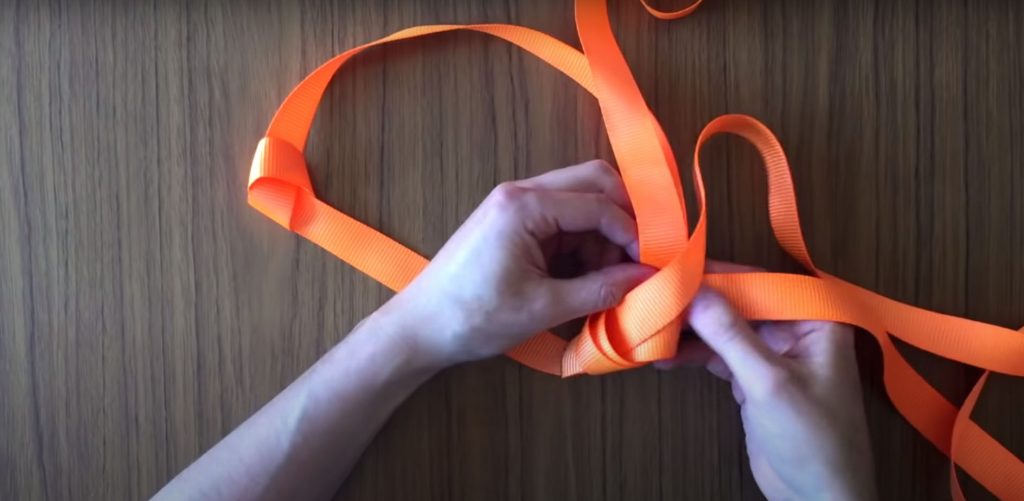
6. Now repeat this on the other side. Just make sure to leave the same amount of slack in your first fold over by retracing your loop. This will also have you doing the knot upside down. So when you run the strap back through the middle, in the first knot it is on the top side of the strap, on the opposite it will be on the bottom. And make sure to adjust your knots so that both sides are equal lengths. IE make sure to watch the video!
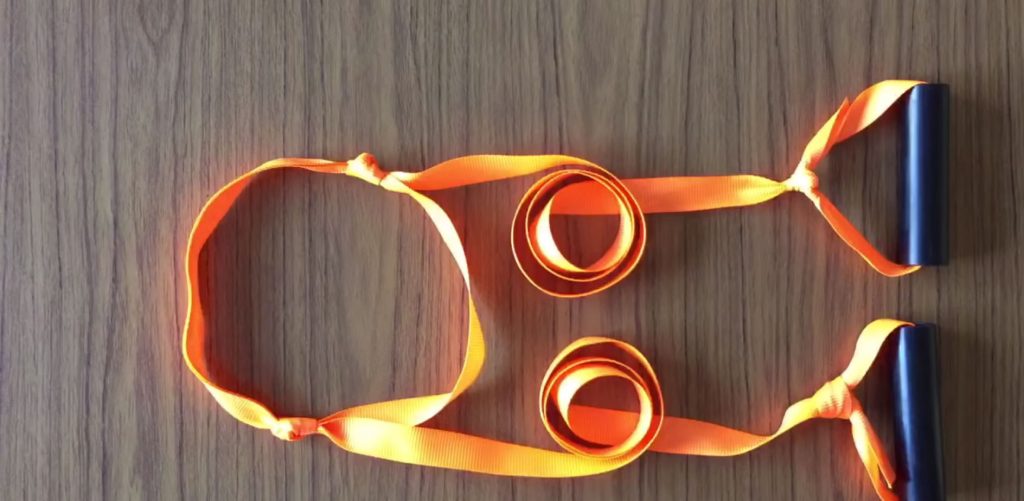
7. Then pull both knots tight and it’s time to make the handle loops.
Building the Handle
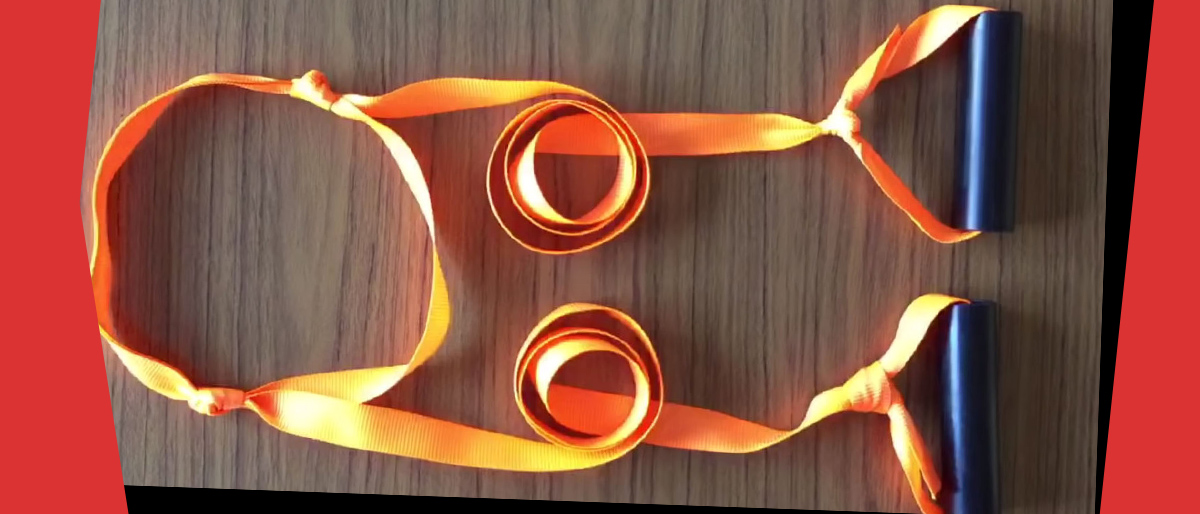
8. Cut your handle pipe. Just grab the pipe and give yourself a little room on each side, mark the width of your handles. Then cut them and you’re done! Try to make sure you don’t leave any jagged sharp edges on the PVC.
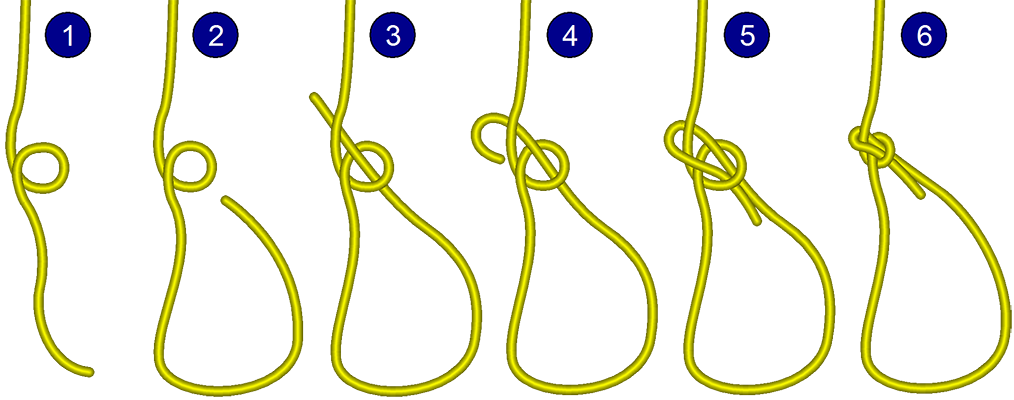
9. Adding our handles. Run the one side of the strap through your handle leaving about 12″ of room. The Tie a BowLine knot.
10. Repeat on the other side!
Building Your Anchor Strap
11. Take your second piece of strap and cut off the loop/buckle and burn the end..
12. Again find the midpoint of the strap and lay it across itself so that you have the strap in two layers.
13. Now thread the midpoint of your second strap through the top loop of your completed first strap. Bring the second strap back over itself and touch the original midpoint to the tow ends of the strap. The strap will now be layer 4 times and connect the first completed strap.
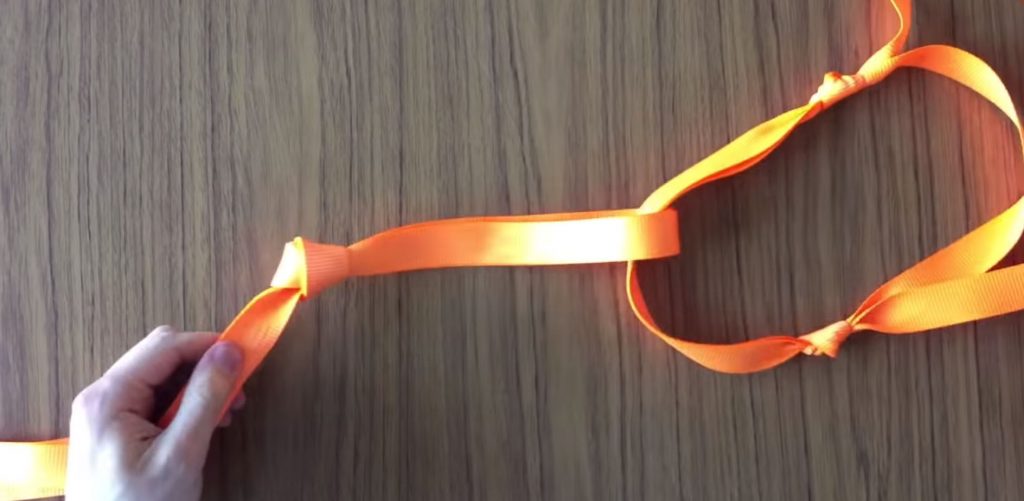
14. Roughly 6″ from where the straps connect tie an overhand knot in the second strap.
15. Repeat this overhand knot process every 6-8 inches or so until you run out of length. These knots will allow you to adjust the length while hanging from a door.
Conclusion
Building your own DIY TRX straps is a cost-effective and accessible way to enhance your body weight fitness routine. With just a few materials and some knot-tying skills, you can create high-quality suspension training equipment that rivals expensive brand-name options. The flexibility to customize the strap length ensures adaptability to various exercises and spaces, making it a valuable addition to your home gym. So, don’t hesitate to embark on this DIY project; it’s a budget-friendly solution that empowers you to take control of your fitness journey. Start crafting your DIY TRX straps today and elevate your workout experience without breaking the bank.